
Summer Sampler 2017: Millcreek Star

It's here! Summer Sampler 2017 starts today with Block 1—Millcreek Star by Katie Blakesley of Swim Bike Quilt.

Hopefully you've heard by now, but just in case you haven't: Summer Sampler 2017 is the block-of-the-week quilt-along that I'm doing with Katie and Faith of Fresh Lemons Quilts. Seventeen gorgeous star blocks, in two sizes each (6" and 12"), plus one fabulous layout for them at the end. And it's not too late to join! You can make the blocks all summer long, alongside us and all the fun peeps in our subscriber-only Facebook group. Click here to purchase.
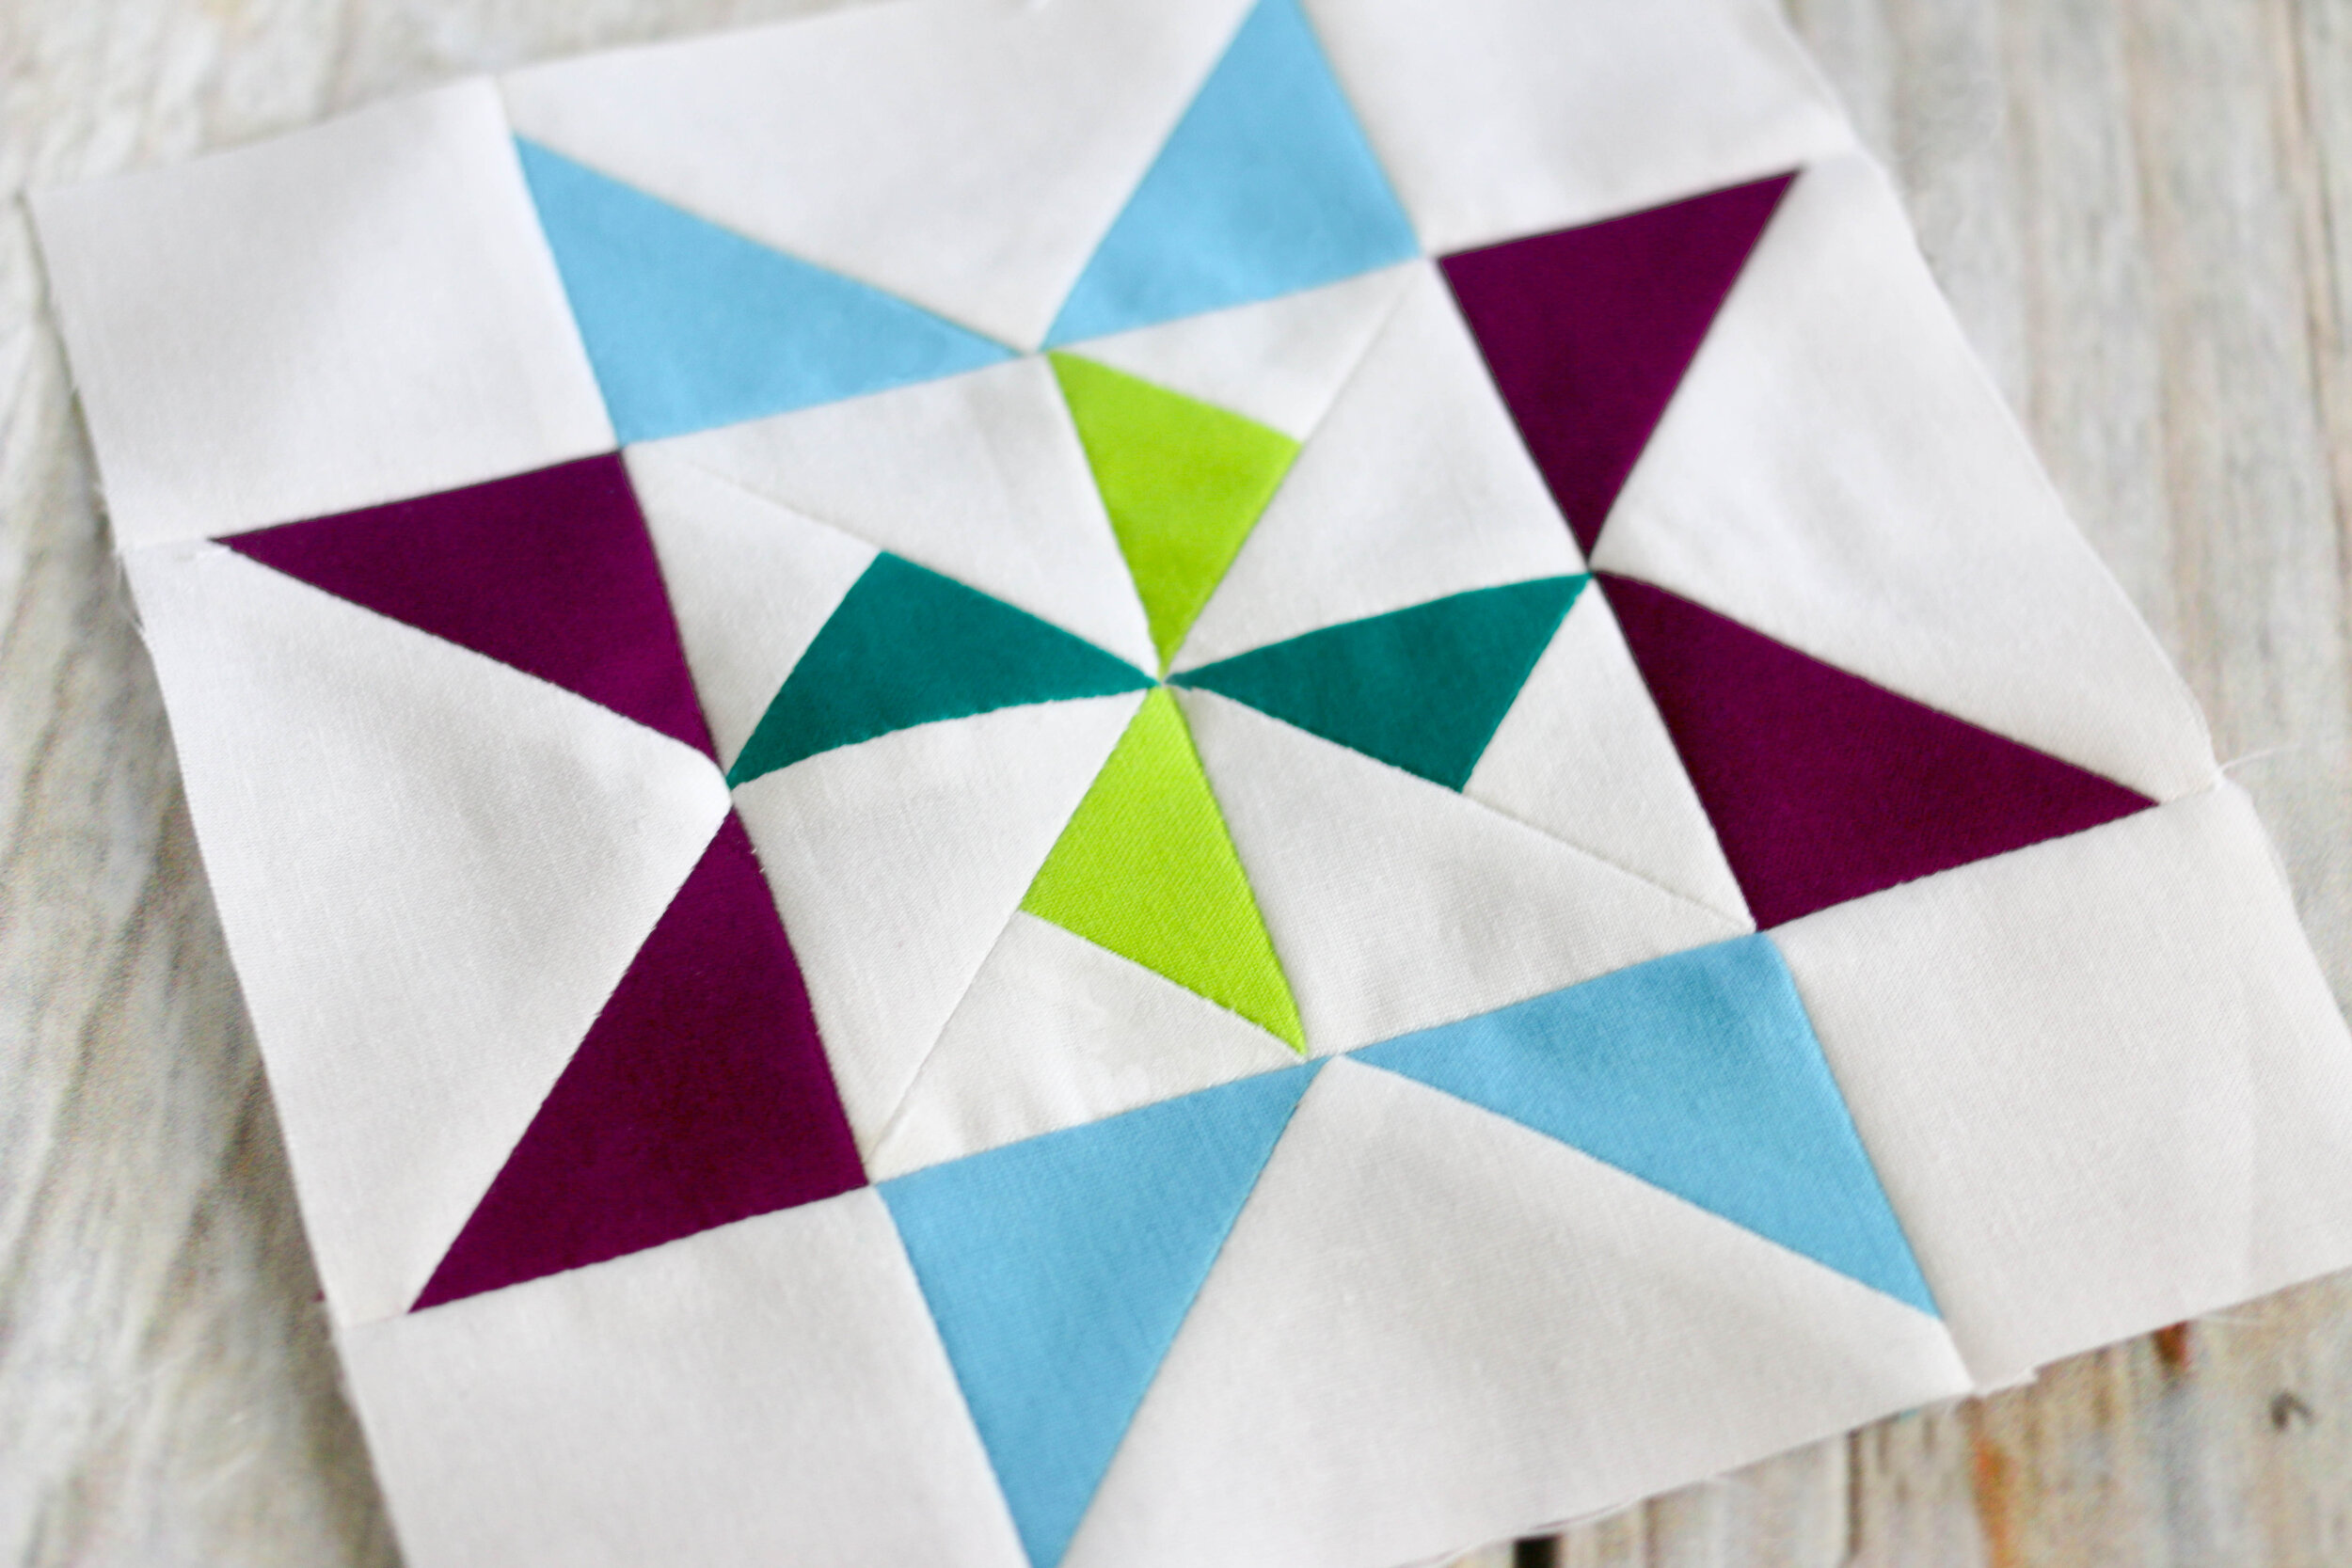
Millcreek Star is a great block to start with—not too complicated, but interesting and fun. During the course of this 17-week quilt-along, I'm going to be blogging a tip for each week's block, to help you get the most out of the series!
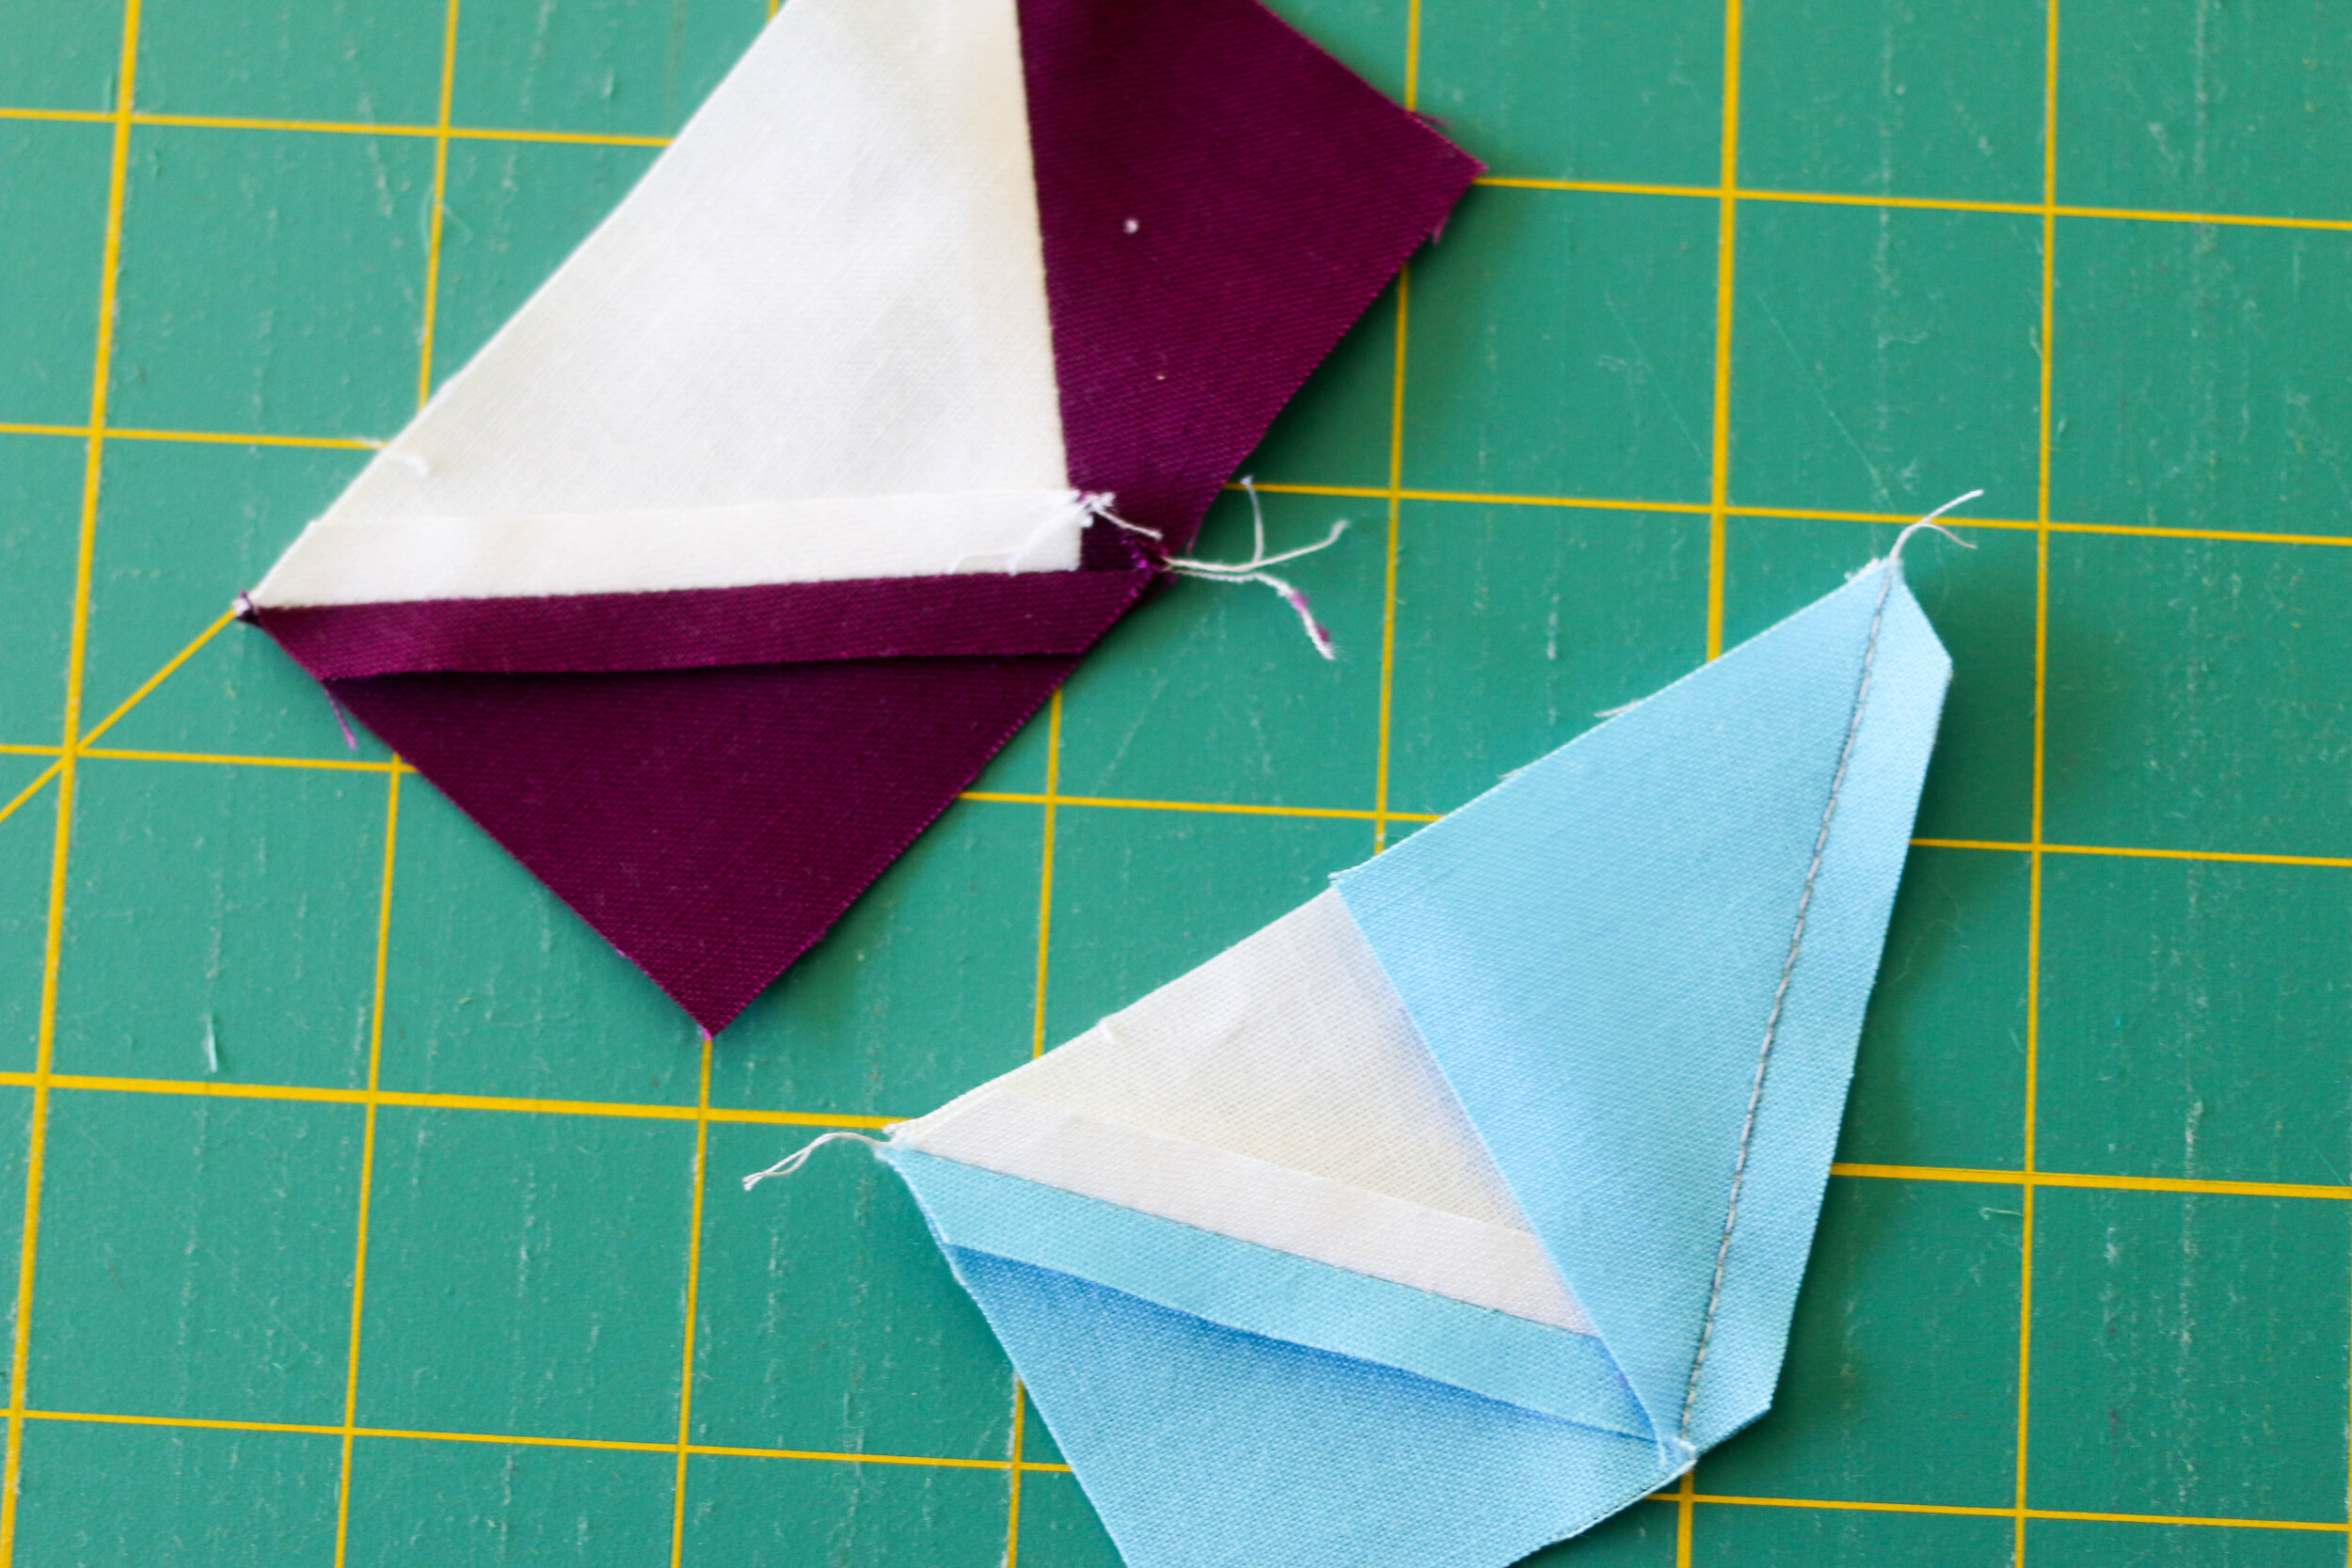
This week's tip is actually TWO tips for making accurate Flying Geese units. I have a feeling we'll be making our share of Flying Geese during the course of this quilt-along, so let's make them correctly, right out of the gate!

First, when using this particular method of making Flying Geese (marking a diagonal line on the back of a square, then sewing along the line), I like to start sewing where the marked diagonal ends in the middle of the rectangle, as opposed to where the line meets the corner. You can see where I'm starting my stitches in the photo above—starting in the center instead of in the corner means less fabric bunching and distortion as you start your seam. Which gives you a flatter, more-square Flying Geese unit.

Second, I always always always press Flying Geese seams OPEN. Even if you're deeply committed to pressing seams to the side, I recommend giving open seams a shot on Flying Geese. Again, it's all about the accuracy! Open seams are flatter, and therefore slightly more accurate, then seams pressed to the side. And when it comes to Flying Geese, the design means that you're less likely to need to nest seams when sewing the finished unit into a block—and in my opinion, nesting seams is really the only compelling reason to press to the side. Open really is the way to go on geese!
Finally, I thought I'd share with you my screw-up from this week, just to give you all a laugh. I've probably sewn thousands of Flying Geese in my lifetime—and yet somehow, I can still manage to sew them wrong on a regular basis! This time, I sewed two triangles onto the wrong side of the unit, and didn't even notice until after I had trimmed off the excess and pressed one of them. Oops. LOL. Fortunately, since I'm working with solids, after ripping out the wrong stitches, I could just flip the triangle around and sew it on the correct way! There would have been more work involved had I been using a print!
Hope you all enjoy Millcreek Star! Don't forget to use the hashtag #summersampler2017 when you share your blocks on social media, and see you next week for Block 2!