
Summer Sampler 2017: Rosetta Star

This week, we're doing my block for Summer Sampler 2017! Meet Rosetta Star.
I have to say, I'm really digging this block. It's just a subtle twist on a standard star block, but it's so fun and unique. Yes, the star points are paper-pieced, but after last week's block I think you'll find this one is a walk in the park! Want to make it? Click here to purchase Summer Sampler 2017! (Just $29.99 gets you this and 16 other blocks, each in two sizes, 6" and 12", plus instructions for a fab sampler layout at the end.)
So let's talk about my tip of the week. There was a lot of discussion in our Summer Sampler 2017 subscriber-only Facebook group about matching up points with last week's Celestial Star block. And it was a challenging one to be sure. Those crazy angles need to be dead-on—even slight discrepancies can really throw off your star points. So how do I get them matched up? Let's look at how I did this week's block.
First—and this applies to any block I'm working on, whether paper-pieced or traditional piecing—match up seams, not edges.
My priority always goes to matching up my seams when I'm piecing together parts of a block. If the seams line up but the edges don't, it's not a big deal, because edges will always be hidden in the seam allowance of the next piece/unit you add. And let me tell you, I'm the queen of fudging seam allowances in situations like that. : )

So here's how it works. Take the two paper-pieced units you want to line up and put them together, fabric sides touching, paper sides out. (I've recently become a convert to leaving the paper on, but that's up to you.) I put my thumb right at the point where seams need to match up, which in this case is where the seam for piece 2 crosses the 1/4" seam allowance line around the edge of the template. Don't pay attention to whether the side edges of the unit match up! Right now you should only worry about the stitched seams.
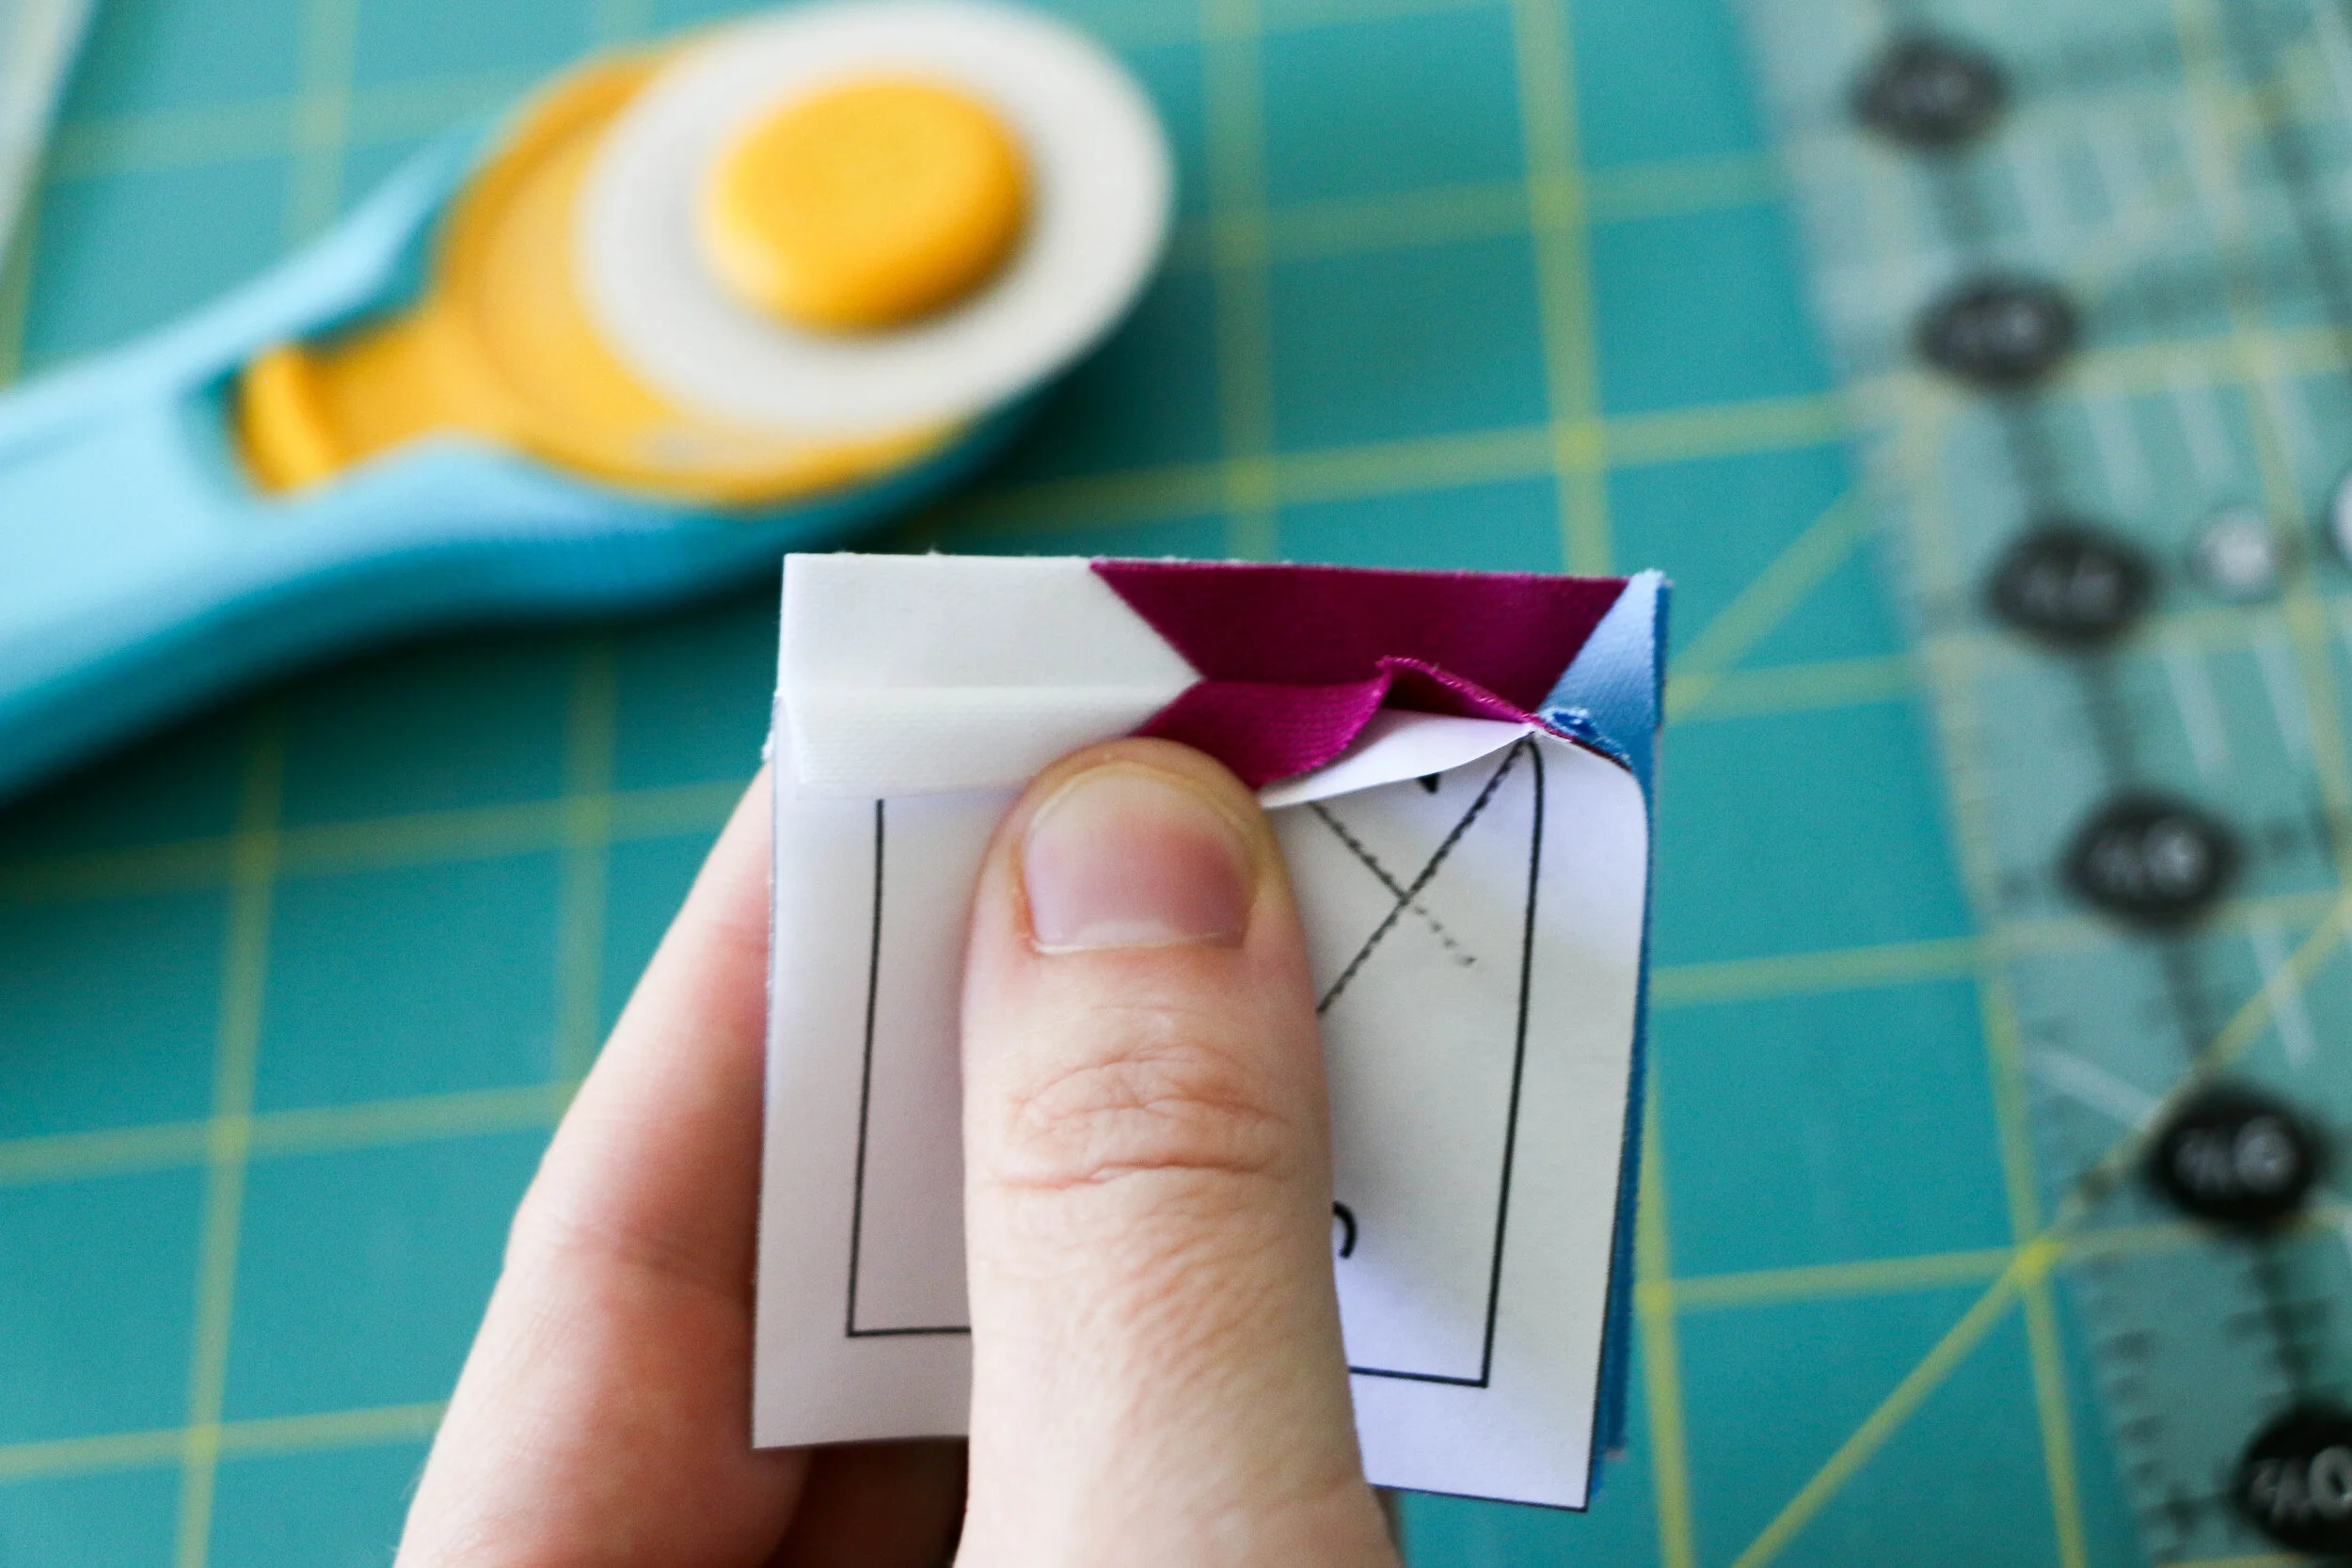
Bend back the paper/fabric unit closest to you, exactly at the quarter-inch seam allowance line on the paper. Adjust the two units slightly until those seams align perfectly, like they do in the photo above! Again, I'm not worrying about the edges of the unit. Only whether that seam between the purple and the white looks good. Once you've got it perfectly into place, with a bigger unit I would probably put a pin right there at that seam. With this tiny unit, I'm just going to forge ahead and check my other seam.

Now, keeping that unit exactly where you had it so the first seam doesn't get nudged, carefully check the other seam that needs aligning. In this case, it's the seam between pieces 2 and 3 (purple and blue). You'll want to nudge that corner seam very carefully into place without screwing up the first seam (this can be tricky and takes practice).
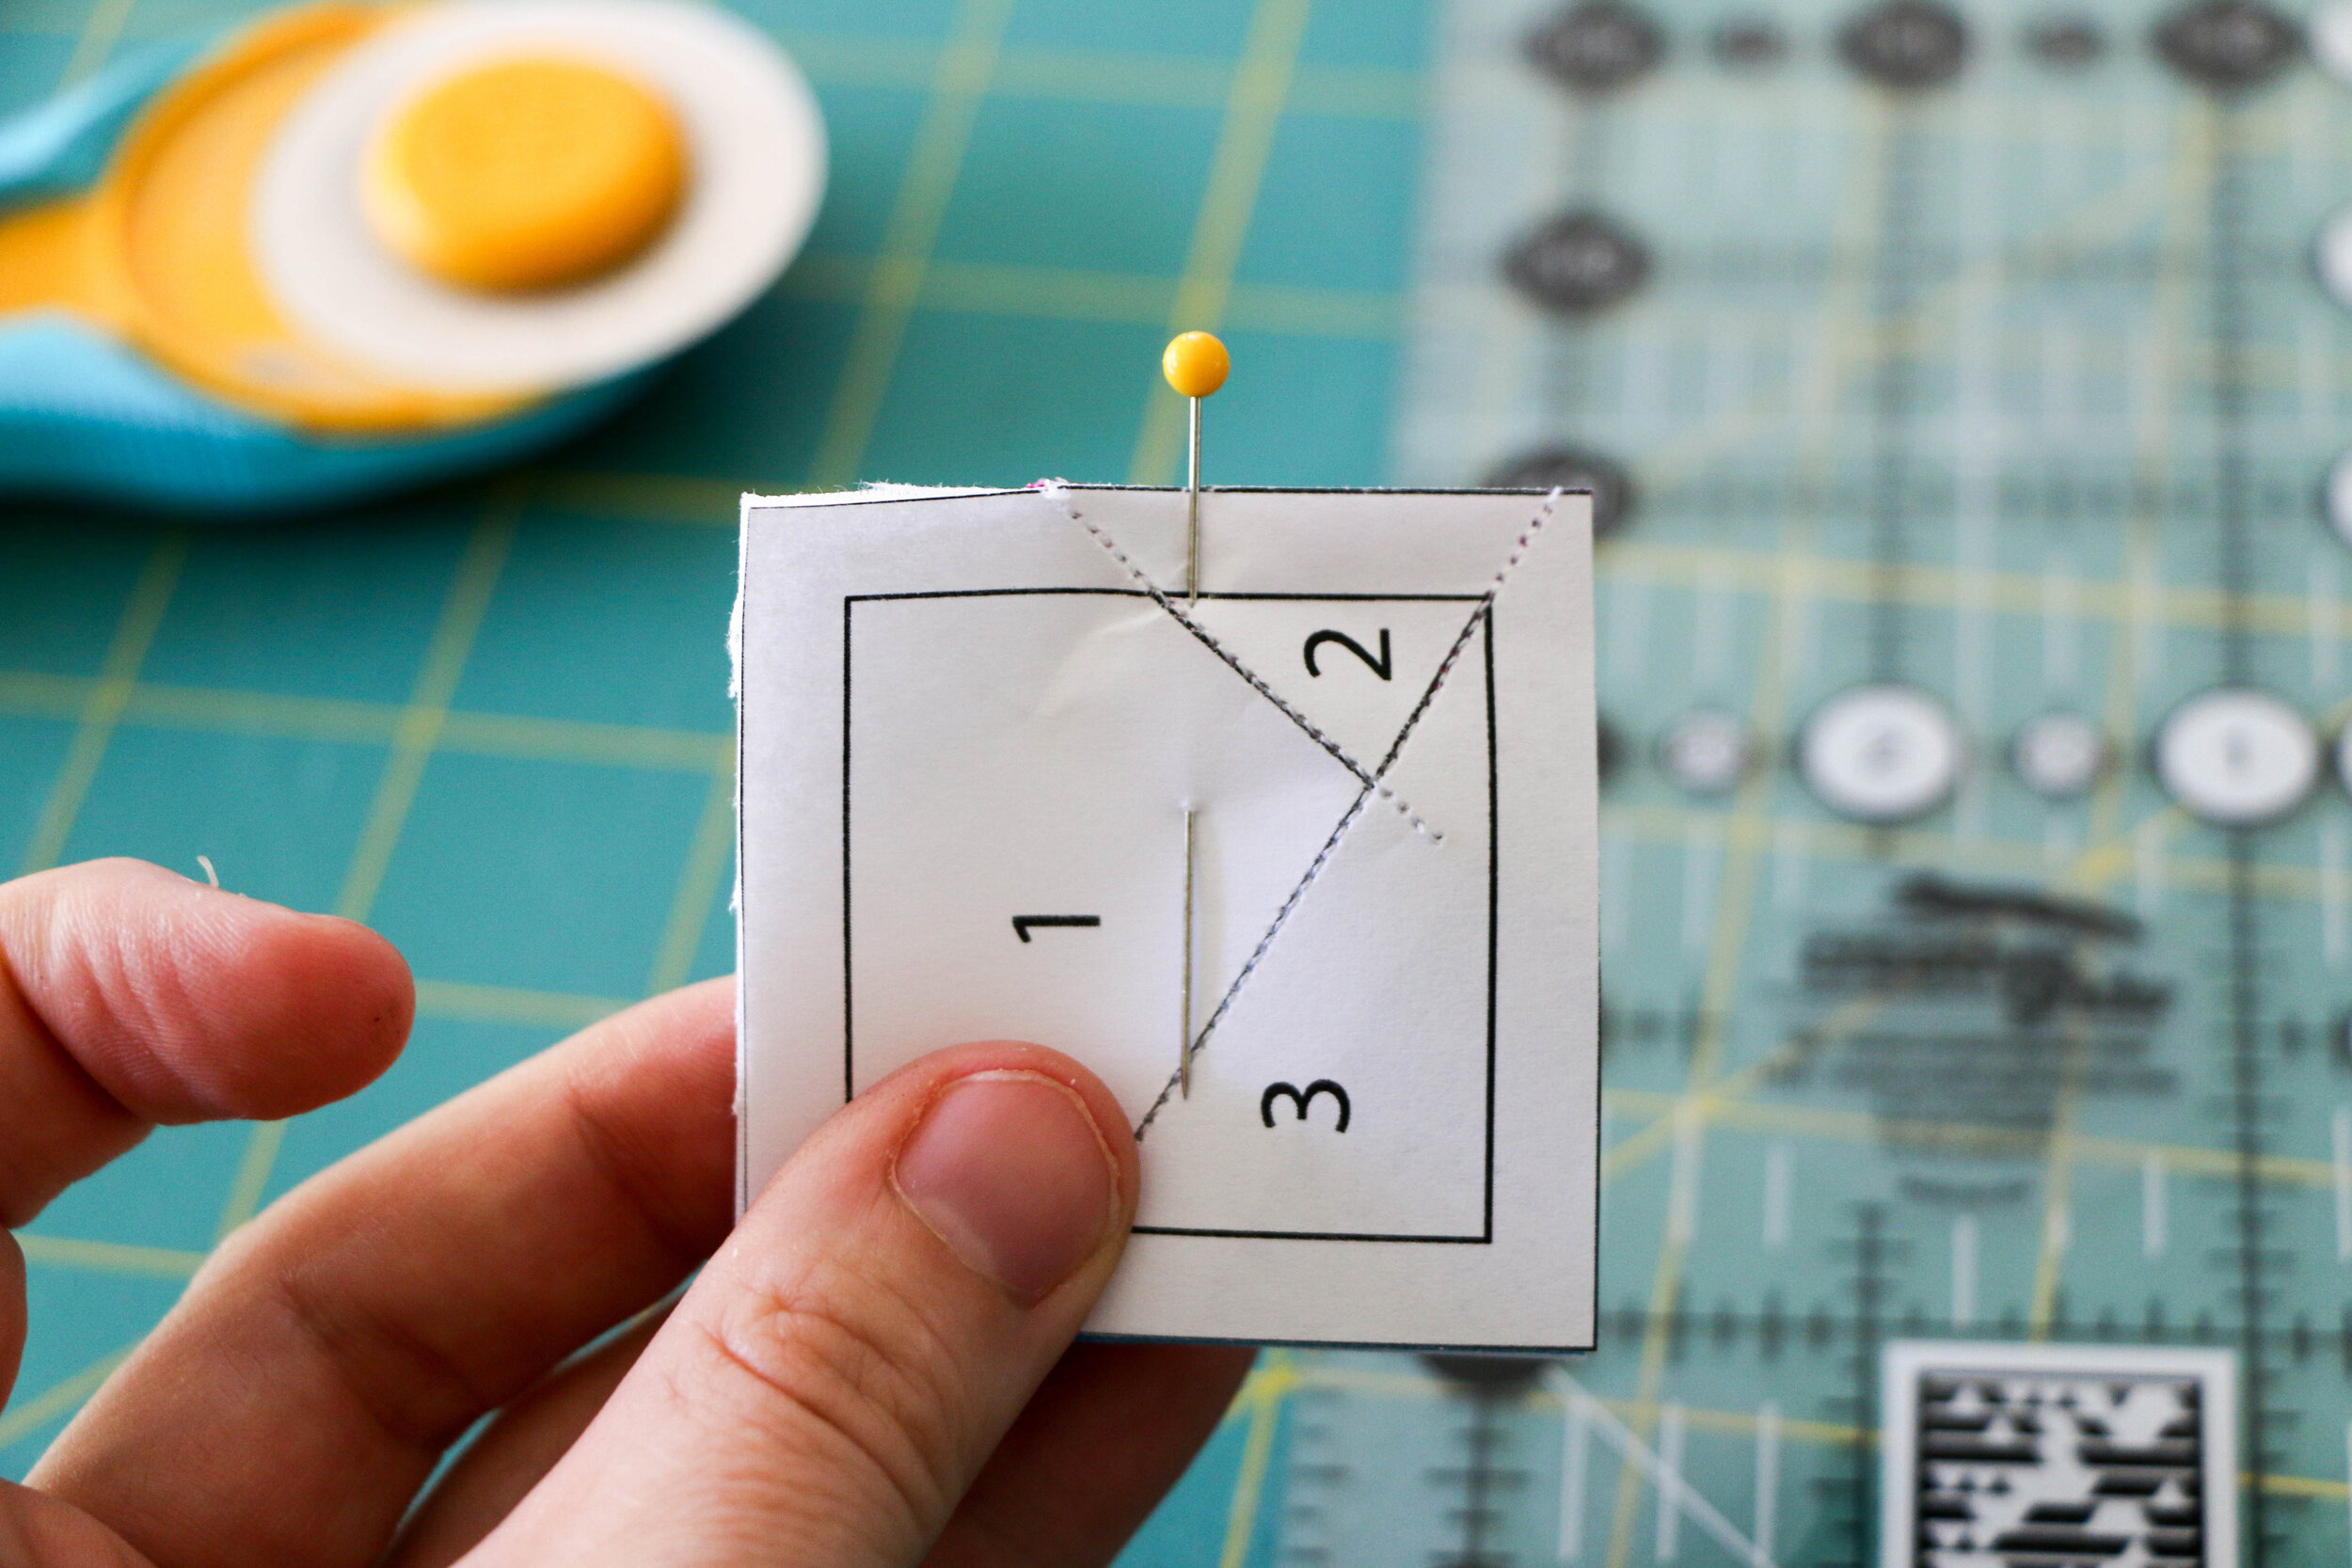
Once both of those seams are aligned, pin that puppy into place nice and securely. You'll notice that I never did check the side edges. Because I still don't care about those. LOL.

Sew it up and see what you've got. Looks pretty good, huh?
Like anything, lining up seams like this takes practice, but keep plugging away and each block will be more perfect than the last, I promise!
Hope you like Rosetta Star! As always, hashtag your progress with #summersampler2017. You guys have been making some gorgeous blocks—so fun to watch everyone's progress! See you next week for Block 5 of Summer Sampler 2017.