Arkansas Traveler: A free block pattern
Welcome back to the Summer Sampler Series. Are you ready for block #6? It's a very unique block, and one of my favorites in the quilt-along!This is the Arkansas Traveler block, #3912 in the Encyclopedia Of Pieced Quilt Patterns. It's also known as Cowboy's Star, Travel Star, or "Teddy's Choice." It's from the "Other Stars" category of patterns in the Encyclopedia.
Not much is known about the history of this block, but it likely dates back to the 1800s, since it shares its name with a popular 19th century folk song. There are several quilt blocks known by the name Arkansas Traveler—the others are variations on spool designs. Arkansas Traveler quilts were sometimes made up of more than one type of Arkansas Traveler block, like the flag quilt above (from writer Earlene Fowler's website).
I'm doing a more modern variation on this block, using 60-degree diamonds instead of the narrower diamonds often used in traditional Arkansas Traveler blocks. Since Faith did such an excellent job of introducing us to paper-piecing with Wednesday's Star block, I thought we'd make this block by combining traditional piecing and paper piecing. Don't worry, it's easier than it sounds!
Cutting
• For diamonds: 2-5/8" x 9" strips - cut 8
• For background: 3" x 6" strips - cut 8; 3" x 9" strips - cut 8
Cutting and Piecing the Diamonds
1. Place your ruler on an angle over the end of one of the 2 5/8" x 9" strips, lining up the 60-degree mark with the bottom of the strip, as shown, and cut.
2. Slide your ruler over. With the 60-degree mark still lined up with the bottom of the strip, line up the 2 5/8" mark on your ruler with the angled (cut) end of the strip, and cut again.
3. You now have a 60-degree diamond. Continue cutting diamonds, two from each strip, until you have 16.
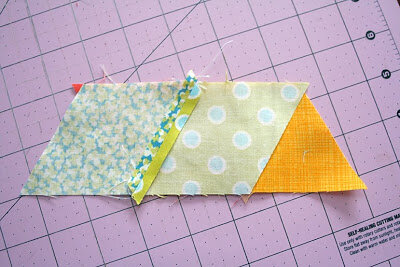
4. Pair up two diamonds, right sides facing, and so that the edges intersect 1/4" from each point (right where your seam will be). This results in little triangles sticking out on each side called dog ears—see them? Make sure those dog ears are showing, and that they're even on each side.
5. Sew and press seam allowances open. Sew together a second pair and press.
6. Put your pairs together, right sides facing, as shown above. Again, make sure the dog ears are correct.
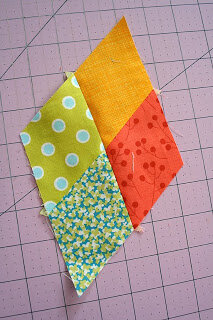
7. Sew and press seam allowances open. You should now have a diamond unit that looks like this. Repeat the steps above until you have four diamond units.
Paper-Piecing the Diamonds into the Background
1. Let me start by saying that if you've never paper-pieced before, and you haven't yet made Faith's Star block, I recommend you do that first. Faith did a great job introducing the skill of paper-piecing, and I don't want to repeat too much of what she explained in her post.
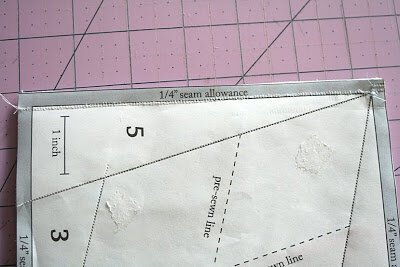
2. Okay, all set? Print out 4 copies of my paper-piecing template for this block, which can be found here. Be sure to set page scaling to "None" or "100 percent" when printing, and after printing, check the 1" scale to make sure it's accurate. Trim the templates.
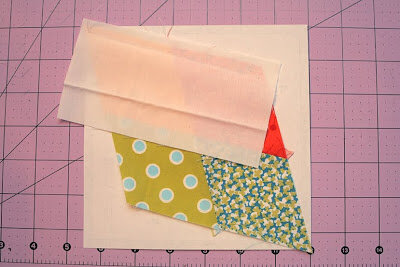
3. Attach one of your peiced diamond units to the back of the template, lining up the diamond seams you sewed in the previous steps with the "pre-sewn line" marks on the front of the template (as much as you can see them through the paper). I flipped down the edges of the diamond unit to make sure the seams were lined up, but don't stress about it too much. Since those diamond seams don't line up with anything else, it's not crucial that they be exact. I used double-sided tape to attach my diamond units to the back of the paper—I prefer that over pins. You could also use a glue stick.
Tip: If you have a certain color/print that you want in the center, place the diamond unit so the center print is between 4 and 5 (where my blue and green floral print is in the photo below), rather than between 2 and 3. This will give your seams an outward radiating pattern.
4. Hold up your template to a light source to visually check that your diamond unit is placed correctly and that there will be 1/4" seam allowance all the way around. This diamond unit is piece #1. You'll add piece #2, a background piece, next.
5. Place a 3" x 6" background piece along the edge of the diamond that borders section #2. Make sure right sides facing and the edges are approximately lined up, as shown. Now turn over the whole thing and sew on the line, through the paper, as Faith showed on her blog. Remember to lower your stitch count to perforate the paper better—I use 1.4.
6. Press back the piece you just sewed and trim any excess seam allowances. Repeat the steps above to add additional background pieces, in order, according to the numbers on the paper template. You will use the 3" x 6" pieces for the first two background pieces, and the 3" x 9" cuts for the second (longer) two pieces.
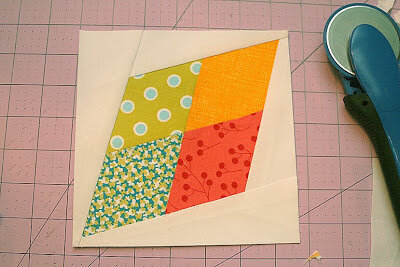
7. Once you've sewed on all four background pieces, it should look like this.
8. Turn the whole thing over and trim around the edges of the paper template. DON'T tear the paper off yet!
9. You now have the first of your four star units. Repeat the steps above to create the other three quarter-block units.
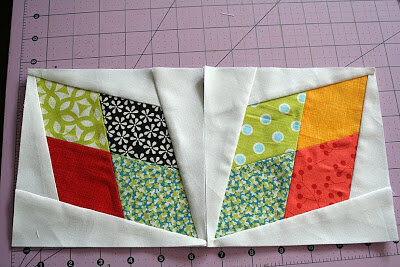
10. Arrange two of the star units as shown.
11. Put the units together, right sides facing, with the paper still on.
12. Sew the two units together on the template's outer line, as shown. So you're now sewing through two star units and two paper templates. There will be a lot of seam bulk where the center points meet, but the paper will give that area some structure, which should keep the fabric from bunching up. It will also help you match up the points more accurately, in spite of the bulk. If your machine gets hung up at that corner, you may need to gently push the units/paper through. You could also try adjusting your presser foot to make it less tight (if your machine has that option) or using a walking foot if you're still having problems.
When you're done sewing, here's what it looks like on the other side. Your sewing should come through the other side right on the other template's line (mine isn't perfect, but it's close enough!)
And here's what it looks like when you're done (the paper is still on the back).
13. Repeat with the other two star points. Finger press the seam allowances open. When you're ready to join the two pairs with the final seam of the block, you can take the paper off if you're worried about the paper making too much bulk in your machine, or leave the paper on and piece it the same way you did the previous two seams.
14. Once the entire block has been pieced, remove the paper and press seams open.
And with that, we are now halfway through this quilt-along! Here are all 6 of my blocks together. I can't wait to see your blocks, especially Arkansas Traveler, so please post pictures to the Flickr group. On Monday, the Summer Sampler Series will be back on Katie's blog to kick off our second half. Have a wonderful weekend, everyone!


