Kitchen remodel: Final pictures
Well, it took me a while, but I finally got my act together and got some pictures posted of my big kitchen refresh project from last summer!
And I have to admit, I kind of love looking at these pictures, because the transformation really is amazing. Yes, it was a ton of work, but all totally worth it.
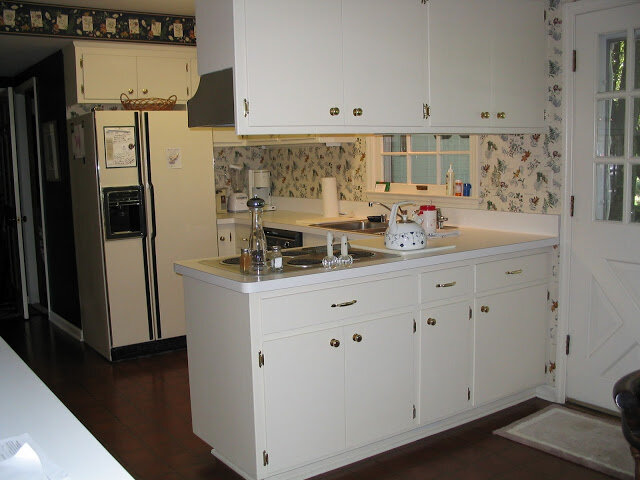
So first, here's a little "before" action for you.
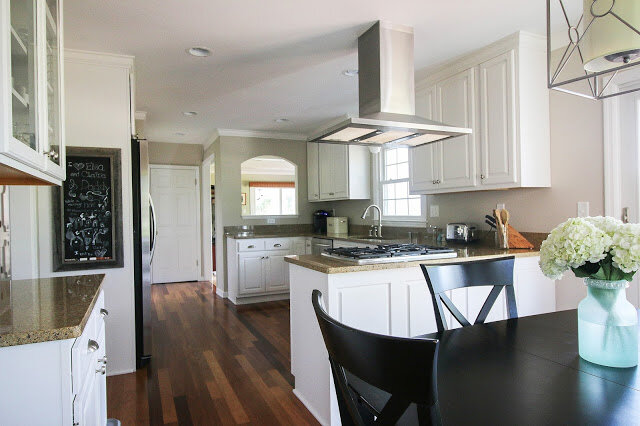
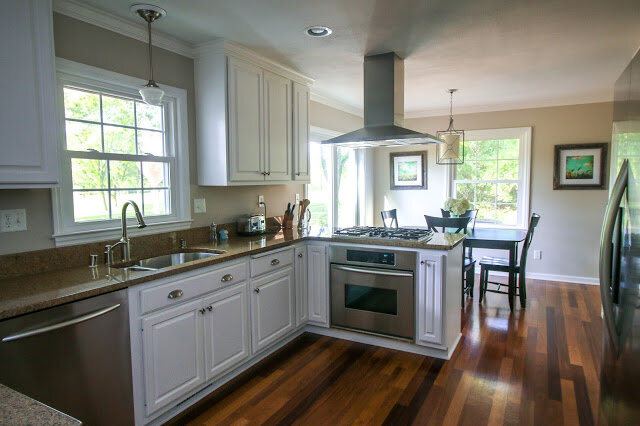
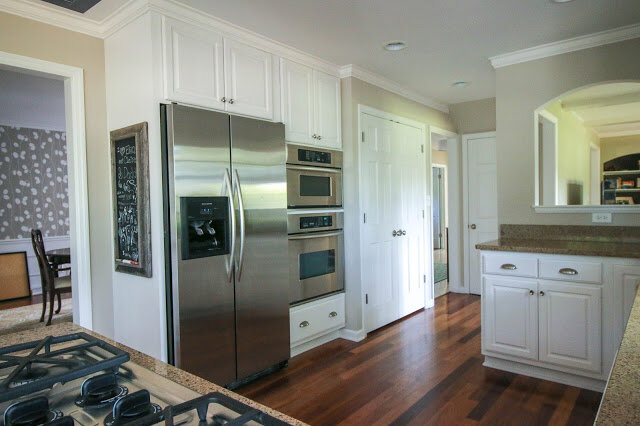
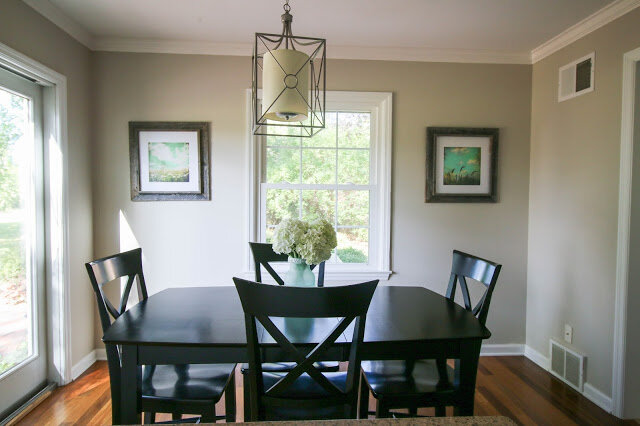
And here's the after!
To recap, I made the following changes:
1) Built the existing upper cabinet boxes up to the ceiling (and purchased/installed new cabinet doors that fit the taller dimensions)
2) Painted all the cabinets (upper and lower) white (Sherwin Williams Snowbound)
3) Painted the walls more of a greige (versus the yellow-white that was there before). I would like to have gone even grayer, but thought it might clash too much with the granite.
4) Took down the window treatments, replaced the light fixtures, and replaced artwork.
Countertops, flooring, and appliances all stayed the same.
Obviously, the first change you probably noticed was the white cabinets. But I would argue that the even more impactful change was building the cabinets up to the ceiling. It's amazing how small and builder-grade the original cabinets look, now that I compare them to the "after" picture! Taking them up to the ceiling instantly made them look more expensive and more custom. It was a major undertaking, but I'd do it again in a heartbeat. For more on how I extended the cabinets, click here. I purchased the new cabinet doors from Cabinet Door World—12 new unpainted upper doors ran me about $900, including shipping.
A few other details: I replaced the can light above the sink with a pendant fixture, using this $16 conversion kit. If you've ever changed a light fixture, converting a recessed light to a hanging fixture is just as easy! I also swapped out all the cabinet hardware.
These glass-doored cabinets were a challenge, in that I didn't feel like painting the inside of them. 😂 So instead I used them as an opportunity to bring some pattern into the room by adding herringbone peel-and-stick wallpaper, which I purchased here. It was super easy to install and it's repositionable if you screw it up.
I chose Sherwin William's Snowbound for the cabinets, mainly because all my existing trim and interior doors were already painted that color. The pantry doors you can see next to the ovens in this photo weren't touched. I thought it made the most sense to keep everything consistent.
Of course there are still a few more things I'd like to do. The biggest is that I would love to take down that small granite backsplash and instead do a subway tile backsplash that extends to the upper cabinets. But I really don't think I want to take on a tiling project myself, so that's going to have to wait until we can get a pro. In fact, see the pass-through on the far left? I would love to do subway tile on that entire wall, all around the pass-through. How fabulous would that be?
I also feel like there's more I could do with this breakfast area, but I'm not sure what. I would love to put in some kind of banquette to make it cozier, but not sure how that would work with so many doorways and windows. Still contemplating.
The more I look at the "before" pictures, the more amazed I am that I lived with it the old way for as long as I did. 😂Funny how that happens!
Oh, and just for fun, since you made it down this far, check out the before before pictures of our kitchen! This is what it looked like 11+ years ago, the day we did our final walk-through before purchasing the house. We gutted it right after we bought the house, making the kitchen work space larger by walling up the exterior door on the right and pushing the peninsula into that spot. We also added the arched pass-through where the refrigerator is in this photo. The evolution of a kitchen—it has come a long way, hasn't it? Funny though, that we went back to white cabinets in the end!
Thanks for checking out my kitchen refresh! As always, I will update this if I make any additional changes!

